I love DIYs! For Baby C's Sanrio Birthday Party, I've decided to make a Hello Kitty Bow Headbands for little girls. If only I have the time, I would DIY everything. Eventhough I hired a party organizer, I still want to give the party a personal touch.
Today was spent doing this Hello Kitty Bow Headbands. I started at 10am and finished at 4pm. All in all, I was able to make 32 pieces. If I still have the time next Sunday, I'll make some more. I'm sure these headbands will look cute on all the little girls in the party!
 |
| Hello Kitty Bow Headband |
If you're also planning a Sanrio or Hello Kitty Party, try making this headband yourself. Here's how:
You will need:
1. Black and red wool felt
2. Glue gun and lots of glue sticks
3. Scissors
4. Ballpen
5. Cardboard
6. Soft elastic bands (for infants)
7. Black wire headbands (for girls 2 years and up)
Step 1. On the cardboard, draw and cut a pattern of the Hello Kitty bow like the pictures below.
 |
| Pattern for the red felt. |
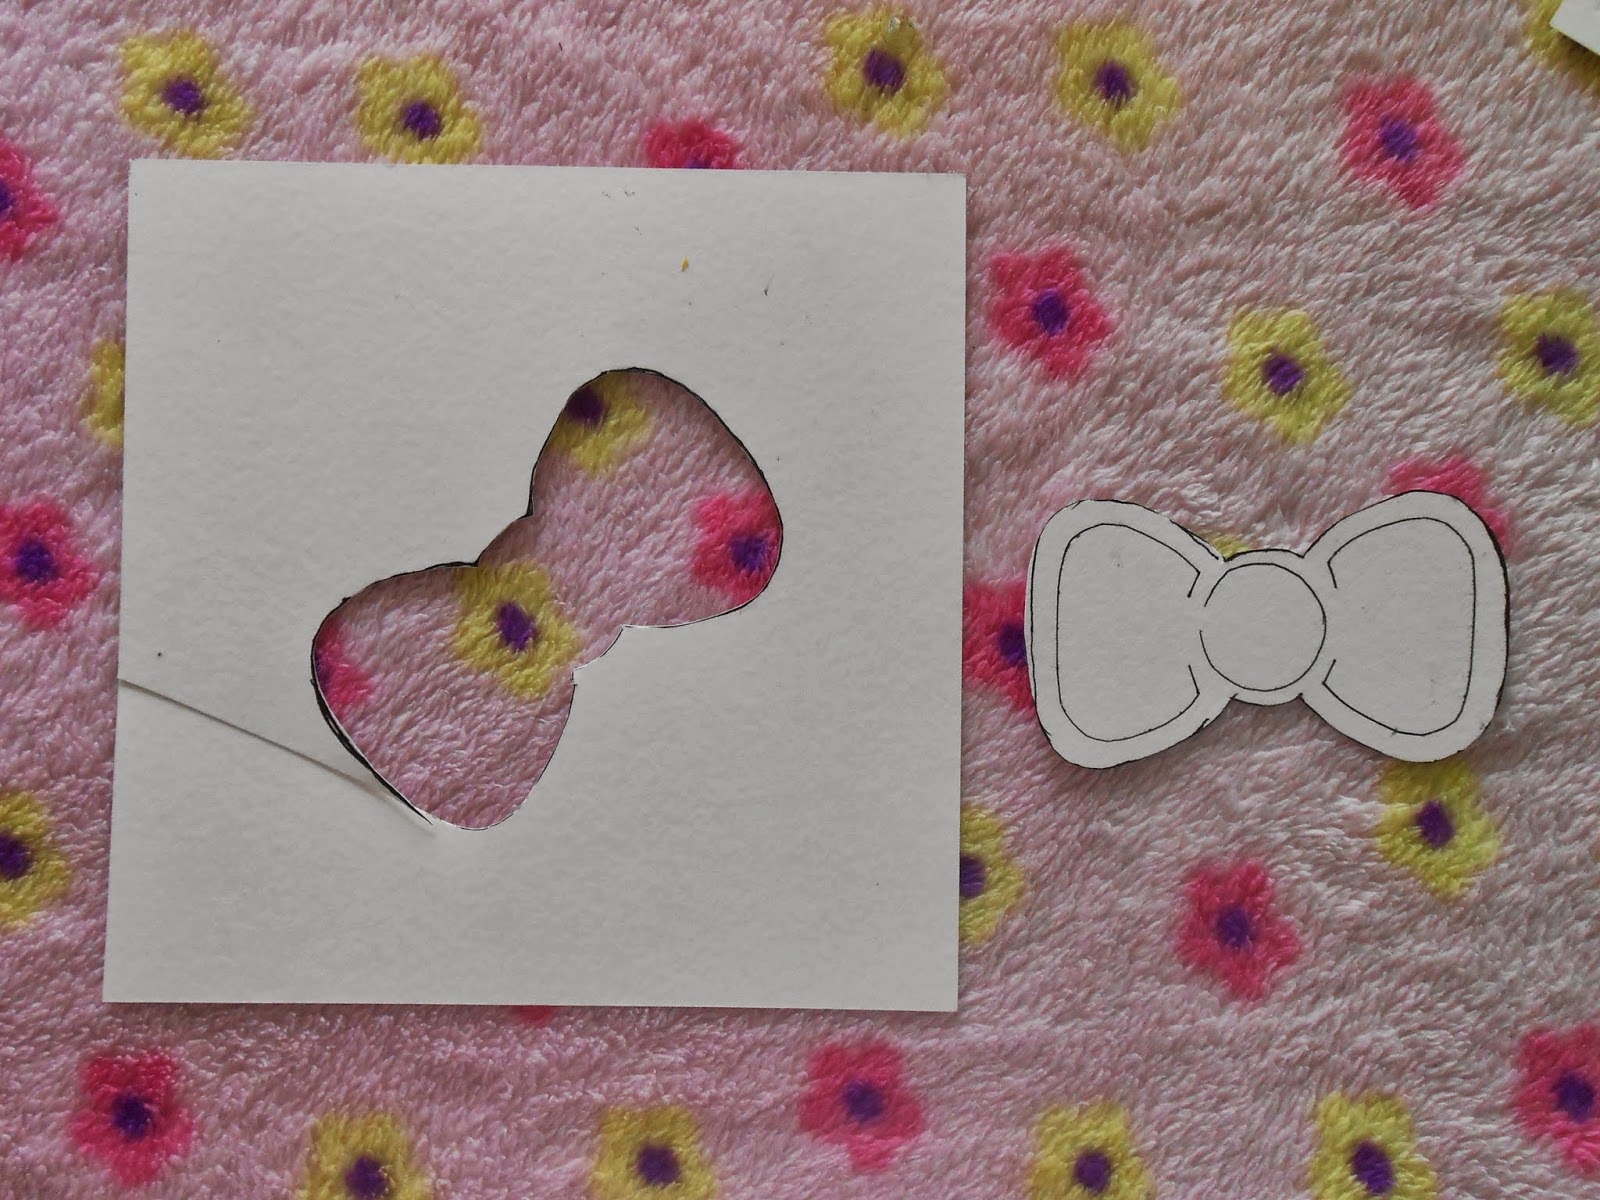 |
| Pattern for the black felt. |
Step 2. Trace the pattern on the felts and cut.


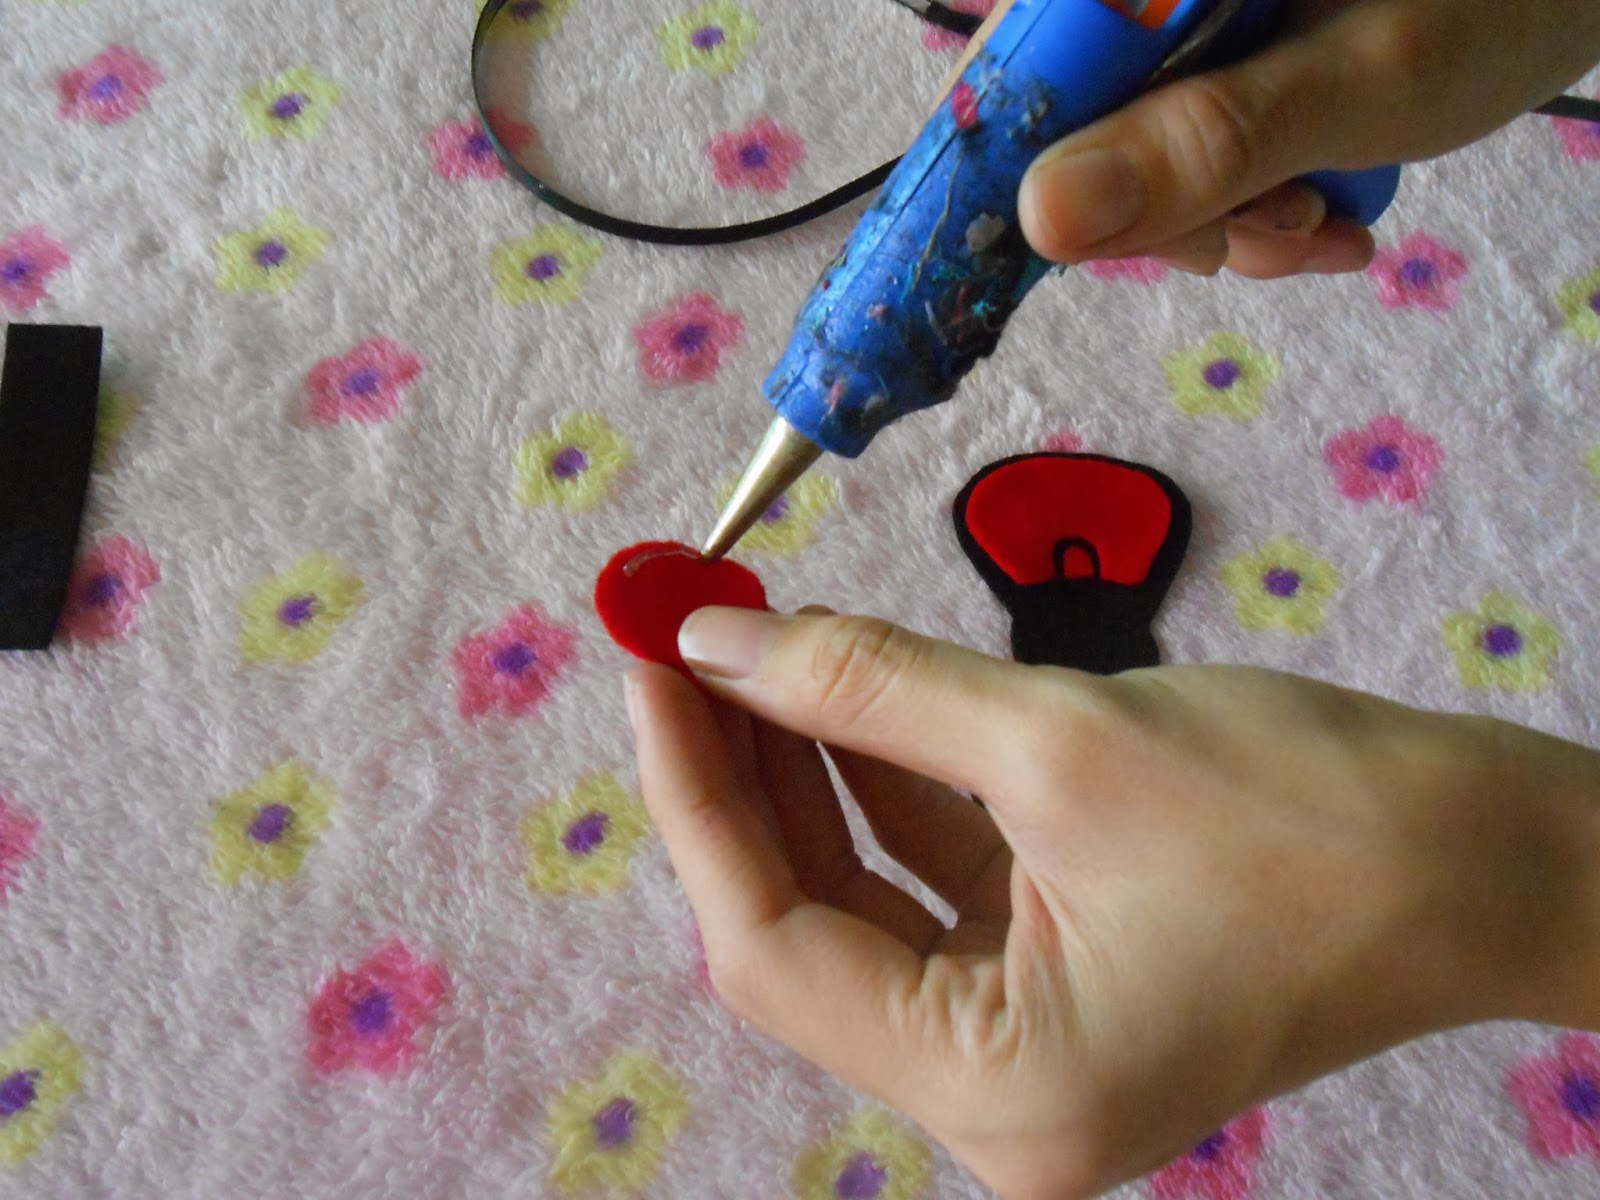
The cut pieces should look like this:


Step 3. Glue all the red pieces on top of the black felt.


Step 4. Glue the bow on top of the headband.

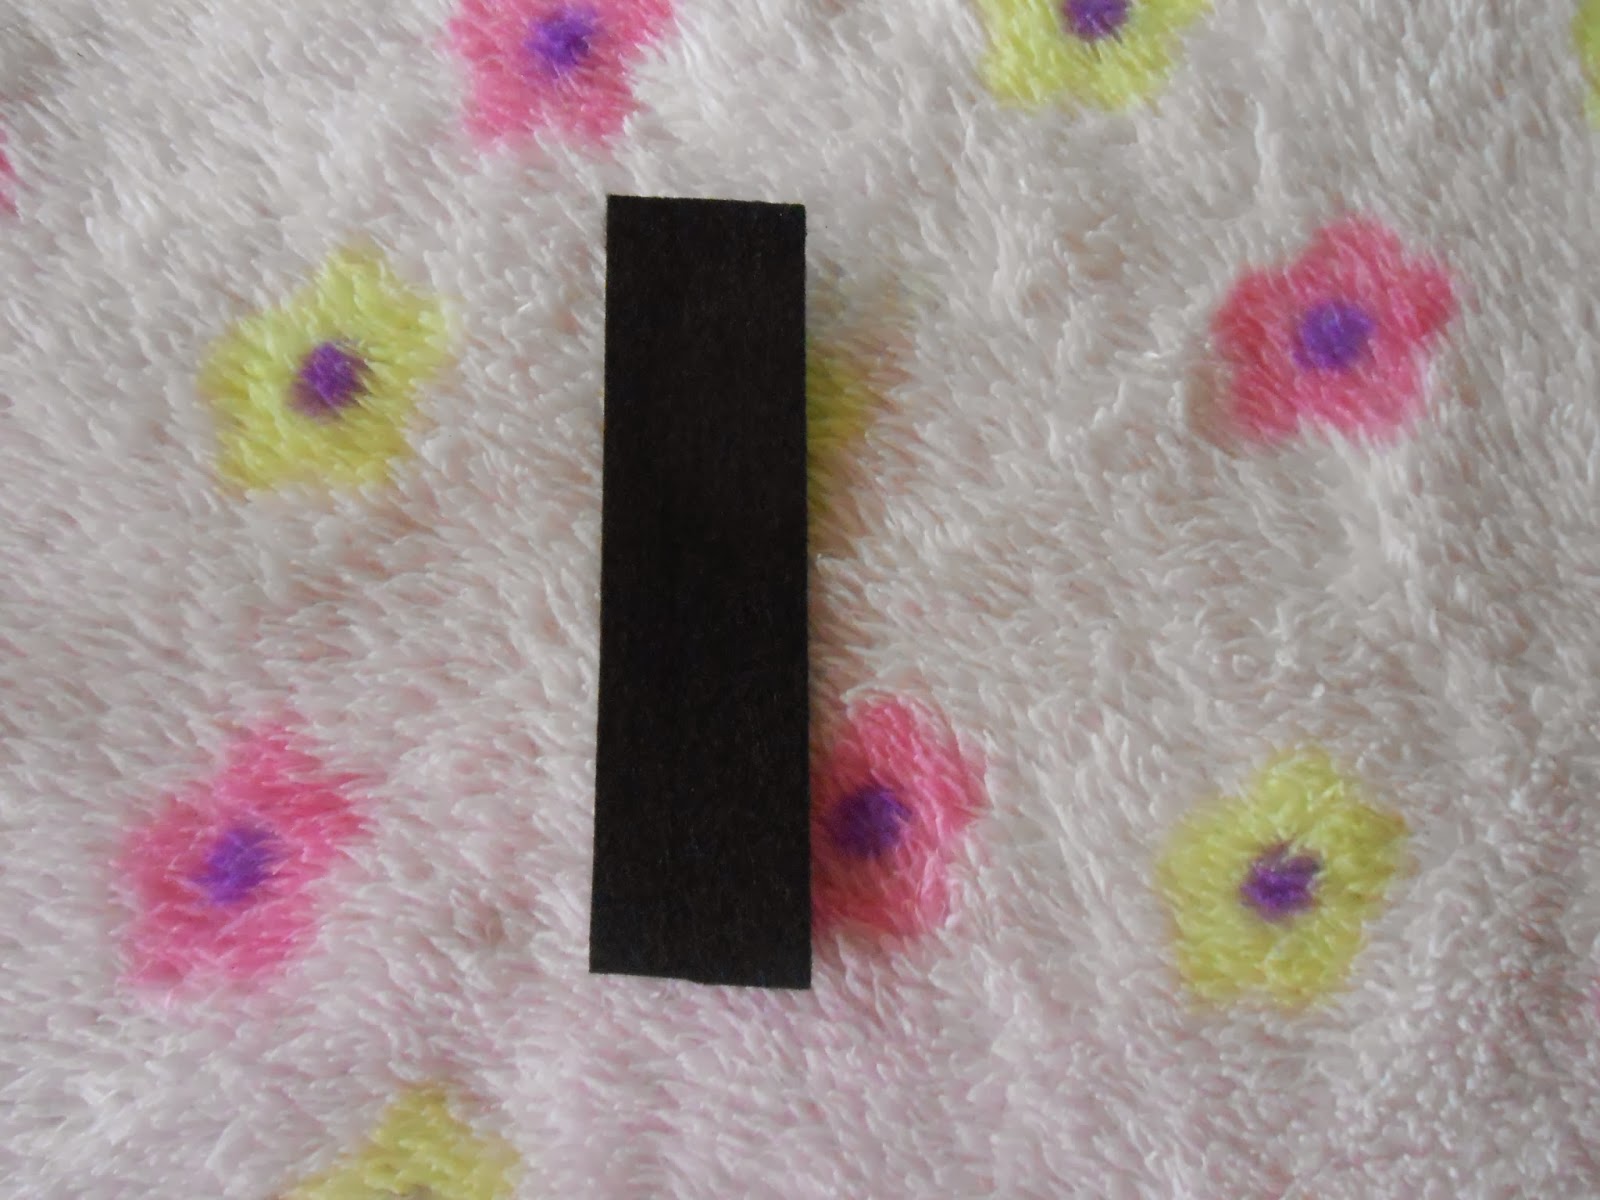
Step 5. Cut a strip of black felt and glue it at the back of the headband.

For newborn to 2 years old, use a soft elastic band.

And you're done!
 |
| Cutie! |

This headband also looks cute on mommies! I love Hello Kitty! Wink! =)

If you want to order these headbands instead, they are available at Czara's Hair Pieces.
Till next DIY tutorial!
very much like ni Baby A yang si Hello Kitty....how much how much????!!!!
ReplyDeletecarol sa party, merong 1 for aerith =)
Deletewow thank you in advance!!! =)
ReplyDelete